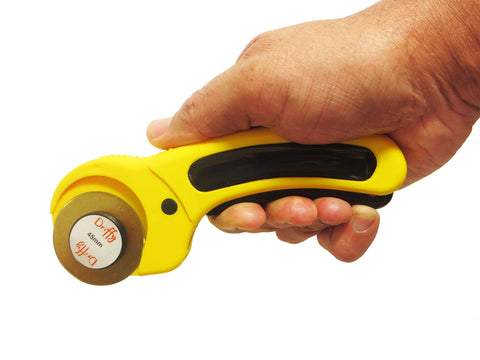
How to use a rotary cutter for fabric cutting - Top Tips to get you Cutter working
 You’ve got your new rotary cutter, you’ve read up on all the safety tips and you’re ready to get to grips with using it. Here we’ll talk you through learning how to get the most from your cutter as you go, with hints and tips on cutting long strips of fabric, and cutting accurately and safely to avoid injury and accident.
Cutting long strips of fabric
The starting point when getting to grips with your rotary fabric cutter and learning to quilt is finding out the best way to cut long strips of fabric. This is really important if you’re going to be tackling strip piece quilting projects. Once you’ve mastered this technique you can then learn how to cut individual patchwork shapes from shorter sub strips as and when you need them.
Using your rotary cutter correctly is essential in making any quilting project a success. When you’re starting out, try choosing inexpensive fabrics or pieces of muslin, until you get the hang of it and gain confidence and accuracy.
Gaining confidence with rotary cutting
When making your first quick pieced quilt, you’ll notice that any pattern instructions will advise you to cut long strips of fabric from selvedge to selvedge (meaning you cut along the fabric’s crosswise grain). If your confidence isn’t quite there yet, it’s fine to begin with working on shorter strips and work your way up.
Rotary Cutting Top Tips
You must always take care to use the cutter away from your body and follow all safety guidelines for your tool.
Always use the correct safety mat for your cutter and grips to keep your rule in place.
It’s much easier to cut fabric if it’s stiffer, don’t be afraid to use laundry starch on your fabric first. It can be washed out easily!
When beginning it’s better to start slowly and not stack lots of strips of fabric up before you rotary cut them. You can do this once you gain confidence and accuracy.
Before you cut any fabric, make sure it’s squared up
Always check and square up to one end of the fabric before you rotary cut it, especially if it’s for a longer and more complicated pattern.
*Remember that after squaring up, the leading edge of the fabric should be at a 9-degree angle to the fold*
Make sure the selvedges are together and fold the fabric accurately along its length. The fabric and fold must be straight and you need to check to make sure there are no puckers in it.
When working with a smaller rotary cutting mat, it might be necessary to fold the fabric once more so it is four layers deep. If you’re a beginner to rotary cutting and quilting, try and stick to as few folds as possible as this will give greater accuracy especially when you are learning.
With the fold near the bottom edge of the mat, put the fabric on it with the side that needs to be squared on the left. Line your rotary ruler up with the folded edge and make sure there is a little excess beyond the left edge of the ruler.
Put a long rotary ruler to the left of the first ruler and make sure the edges of it are flush.
Take away the right side ruler and then carefully place your hand on the remaining ruler to hold it firmly in place. Now roll your rotary cutter from bottom to top and along the ruler's right edge.
For extra safety and security make sure to spread your fingers out to hold the ruler. Make sure your fingers are not in the way of the cutter.
The cut edge of the fabric should now be at a 90-degree angle to edge of the fabric that is folded.
Learning to rotary cut long strips and different shapes
Taking the squared up edge as lead rotary cut the fabric strips required
To give a clue: If a 3" wide strip is needed, match the 3" mark on the ruler with the left edge of your fabric. Line up a horizontal line near the bottom of the ruler with the fold. Use a rotary cutter to cut along the right side of the ruler.
Before you make each cut:
Make sure that the left and bottom edges of the fabric line up as perfectly as possible with vertical and horizontal markings on the ruler.
If this isn’t the case, start again and square up the end again before cutting more strips.
You’ll probably find that after a few cuts you’ll lose your square up and will have to start again - this is something that even professionals find! One way to deal with this is to open a rotary cut strip to its full width, then take a look at the area which is near to the fold.
If the strip has a bend in the middle then the left edge of the fabric won’t be square.
Rotary cutting segments from strips
Take the right end of a cut strip and place your rotary ruler on it. Align the horizontal rule with the lower edge. Then cut along the right edge of the ruler and square it up with the end of the strip.
In the same manner, you cut the original fabric strips, now turn the strip around and cut segments from its left edge.


Leave a comment
Please note, comments need to be approved before they are published.